Tuesday, September 25, 2012

"Ten Apples Up On Top" with Apple Playdough

We love books. Especially books that allow us to play and read at the same time! I saw a recipe on Pinterest for Apple Playdough but didn't have the book the original blogger used with her activity. After looking through my bookshelf I realized we had "Ten Apples Up on Top" and that it would be perfect! I picked up some inexpensive apple cookie cutters at my local craft store so that the kids could all make apples while we read the book. This apple scented playdough would be perfect for any fall activity or book with apples in it! It smells SO yummy!

The first thing we did was make the playdough. Here's the recipe:

*1 cup flour
*1/2 cup salt (use iodized, not kosher for smoother dough)
*1 Tablespoon olive oil
*1 Tablespoon cream of tartar
*1 cup water
*Red food coloring (I use the Wilton gel colors)
*1/2 teaspoon ground cinnamon
*1/4 teaspoon ground nutmeg
*1/8 teaspoon ground allspice
*1/8 teaspoon ground cardamom

1. Stir ingredients together well in pot. 
2. Over medium heat cook the dough, stirring constantly until it forms a ball. 
3. Turn dough onto a board (or the countertop) and knead until very smooth. 
4. Cool. 
5. Store in a covered plastic container.

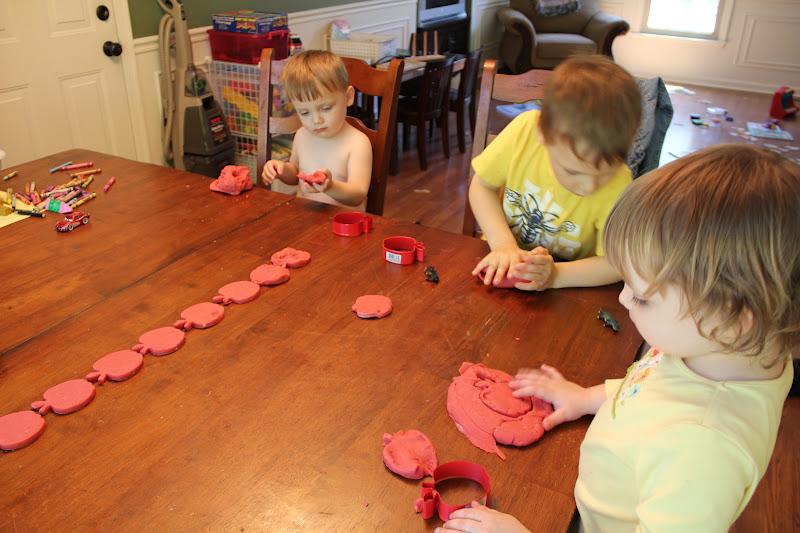
When we were reading the book I kept a cookie cutter and a portion of the playdough for myself, making an apple each time the characters in the story added one to the tops of their heads and stacking mine like the illustrations.


Elephant Toothpaste

This is such a fun little science experiment that is a variation on the volcano explosion we all know from elementary school science class. My kids were amazed at how thick the mixture came out! We will definitely be doing this a lot!

I got the idea and the recipe here:
http://preschoolpowolpackets.blogspot.com/2012/01/science-experiment-elephant-toothpaste.html

*2 tablespoons warm water
*1 teaspoon yeast
*1/2 cup 6% (or higher) Hydrogen Peroxide. (I couldn't find this in stores so I ordered it from Amazon.)
*4-5 drops of food coloring
*squirt of dish soap.

1. Set a bottle or a jar in the middle of a cookie sheet.
2. In a seperate bowl mix water and yeast together and let sit until dissolved.
3. Mix the hydrogen peroxide, the food coloring and the dish soap in your bottle.
4. Pour the yeast mixture into your bottle.
5. Watch the reaction!


Magic Mud

This was so cool! This activity lasted for well over an hour and it kept Tate's attention the longest! This will definitely go into my bag of tricks! We had already been playing with this for almost an hour when Nathan got home from school and he joined right in, taking it outside and playing with it for another half an hour at least! Definitely great for kids of all ages!

1 cup of water
food coloring
2 cups of corn starch

*Pour water into a bowl.
*Add food coloring and stir until mixed thoroughly
*Add 2 cups of corn starch
*Mix well. This will take some effort! It is not easy to mix, but once mixed it is a lot of fun!

This activity is a great way to play with solid vs. liquid. If you gently touch the mixture it reacts like a liquid, but if you strike the mixture hard to reacts like a solid. My kids were amazed at how it could be so gooey one second and hard as a rock the next!

Clean up is easy. If any gets out of the bowl is dries quickly and can be swept up. Any other residue is quickly cleaned up with a wet rag. I should have realized ahead of time that so much of the mixture was going to end up outside the bowl, but I didn't. Next time I may put down a layer of our craft paper to help clean up even easier! And I will definitely double the recipe next time to make enough for each kid to have their own bowl or cookie sheet.


Alphabet Eggs

These are a great little tool for working on letter recognition. These can be a simple game of picking up a letter and talking about what it is, what sound it makes and what words begin with it or it can be a more difficult game of matching upper case letters to lower case letters. You could even hide these eggs around your house with things in them that start with the letters and talk about them as the kids find them. I am sure that there are many more ways that you could come up with to use these!

Since I still have pre-k aged children we started with the simple version. Lana loved this!! But she is my two year old who is always begging for homework and loves anything to do with learning. To be fair, her twin brother fell asleep while I was prepping this activity so I'm not sure if he would have liked it or not. Our adventurous 4 year old who likes everything fast paced told me that this was "too slow" and may have also used the word "boring." Since he was the one who had picked out this activity on Pinterest I was hoping he would really like it! The next time we play with the Alphabet Eggs I am going to do an Egg Hunt! I am sure the increased activity level will help Tate participate more willingly. For now I am VERY happy to add these to my box of activities!


Wednesday, September 19, 2012

Watercolor Paints

This was another fun activity that the kids really enjoyed. Of course any paint activity usually gets rave reviews in our house! These paints are pretty easy to make, the hard part is waiting for them to dry so that you can use them!

This idea came from here:
http://happyhooligans.wordpress.com/2012/03/07/home-made-water-colour-paints/

  • 4 tbsp baking soda
  • 2 tbsp white vinegar
  • 1/2 tsp light or golden corn syrup
  • 2 tbsp corn starch
  • Food colouring
  • container to keep your paints in – I used a  muffin tin, but you could use an ice-cube tray, small plastic cups, plastic egg carton etc.

  • *Mix your baking soda and vinegar together and wait for the fizzing to stop. It’s handy if you mix in a container that has a spout (I used a 2c measuring cup).
    *Add your corn syrup and corn starch, and mix well until the corn starch has dissolved.
    *Pour into your containers. (I doubled the recipe.)
    *Use toothpicks for adding your colours, stirring to make sure the colour is mixed in well.  
    *Let dry for a couple of days.


    Pinterest Makes Me a Better Mom!

    I love doing activities with the kids, but I can't always come up with new ideas or creative ideas that will keep their attention but after joining Pinterest I have been able to find a ton of ideas that the kids love!!! My plan is to share all of the fun with you!

    I try to do as many fun and educational activities with the kids at home as I can. Lana and Jackson are 2 1/2 years old and very curious about their letters, numbers, colors and shapes. Lana is constantly asking for homework! Tate is 4 years old and has a hard time sitting still so traditional worksheets and workbooks aren't a good fit with him. He also doesn't like to recite his numbers or letters so we have to trick him into participating by making activities silly.

    One of the very first activities I tried was a sensory bin full of uncooked rice. I hid our alphabet magnets in it and let the kids take turns finding the letters. As they found the letters we talked about each one and thought of words that started with them. They loved this little treasure hunt!

    Painting on Tin Foil

    This idea came from this ingenious mom on Pinterest!
    http://youllthankmeoneday.blogspot.ca/2011/04/painting-on-tinfoil.html

    Now I must say that while my kids really liked this and thought it was pretty neat, we didn't see the brilliant colors this mom raved about. But, that being said, any type of painting is usually a big hit with my almost 3 year old twins. It captured my 4 year olds attention for a litte while, but not nearly as long as my little guys.

    It's a pretty simple activity. All you need is paint, a brush and some tin foil!


    Adventures in Fingerpaints

    We've been having alot of fun making our own art supplies lately. One of our favorites was fingerpaints. They were really easy to make and a lot of fun to paint with once they cooled. They had a really smooth texture and the colors were so vibrant! It was another great way to work on our colors. The only thing I would do differently is store them in the refrigerator becasue they got moldy after a couple of days sitting out at room temperature.

    THIS WAS A BIG HIT!

    Tate had a great time with this activity. He really enjoyed combining the colors and squishing them through his fingers. He quickly created the color brown! It took Jackson awhile to get used to the messiness of the paints, but once he did he seemed to enjoy making a small picture. Lana is my resident artist. She took her time trying each color, creating a picture of swirls, smudges and lines that she was pleased with.

    Here's the recipe we used:
    3 tablespoons sugar
    1/2 teaspoon salt
    1/2 cup corn starch
    2 cups water

    *Combine ingredients in small saucepan.
    *Warm until mixture starts to thicken.
    *Cool and pour into containers, adding food coloring to create desired colors.

    Calming Jars

    I've seen these cool little jars/bottles referred to in so many ways on Pinterest. Some people call them calming jars or time out jars and some refer to them as quiet jars. Whatever you call them THEY WORK! My kids are amazed by them and it's works like magic on my son with ADHD when he is in the middle of one of his "hyper episodes." Now I must say that I don't use these very often. I think they would lose their effectiveness if you used them for every offense that required a "time out." I tend to use these when my warnings aren't working and my voice is lost in the chaos of four kids running around like crazy people!!

    Here is the original post where I found my directions:
    http://mycrazyblessedlife.com/2011/10/03/relax-bottletime-out-timer/

    *First clean the bottles thoroughly and remove any labels.
    *Fill each bottle about 3/4 with HOT water so that the glue will dissolve.
    *Next, add an entire bottle of glitter glue and a small tube of ultra fine glitter.
    *Keep playing with the mixture until the glitter settles at about 5 min. I added more clear gel glue to make it go slower or more water to make it settle faster.
    *Then super glue the lids on. 


    Thursday, September 6, 2012

    Fun Sticks!

    These colorful sticks are so fun! They are definitely a go to whenever we have a free moment to explore shapes, colors, letters, numbers or just want to play!

    These start with your basic craft sticks. I spray painted mine to make the painting process go a little quicker, but you could paint them any way you like. Then you need to attach velcro dots. I purchased the ones that already have adhesive on. The original blogger said to put velcro on both ends of each side of the stick. My budget didn't allow for me to do that, so I just alternated putting one piece on each side of the stick making sure that one side had the "scratchy" side of the velcro and the other side had the "soft" side of the velcro at the opposite end. I keep ours in a pencil box!

    The original idea came from here:
    http://tottreasuresnorthbay.blogspot.com/2012/01/easy-and-fun-diy.html


    We were making squares. Little Miss Smartypants made a diamond!

    Roy G. Biv Spaghetti

    To continue working on our colors we made rainbow spaghetti. It was so easy and the kids loved making their ROY G. BIV rainbows with it. Here are the directions:
    Cooked Spaghetti, drained
    Vegetable Oil
    Food Coloring
    *Cook spaghetti as directed. Drain.
    *Toss in a small amount of vegetable oil.
    *Divide into enough portions for the number of colors you want.
    *Add food coloring to each portion.
    *Toss.

    I gave each of the kids a cookie sheet to make their rainbows on. The activity was a big hit and a great way to reinforce our colors!!

    Tuesday, September 4, 2012

    Crayola's Window Crayons

    This is a really fun activity to do on those rainy days when you're stuck inside. My kids love to color all over my doors and walls. It makes for a very unhappy momma. When I discovered these window crayons I thought I was in heaven! Such a great way to twist an unacceptable activity into an acceptable one. The best thing is that the mess is cleaned up with a little bit of Windex. To say this was a big hit is an understatement! I highly recommend them!!