Saturday, October 13, 2012

Pasta Beads

When I found out that the same recipe we used to make Rainbow Rice could be used to make pasta beads I just knew I had to try it!! I made the beads a couple of days before we were going to use them since they take a while to dry. Once they were dry I decided that we would make necklaces out of them! The first time we tried to make the necklaces we used yarn, but it was just too thick to go through the pasta. A couple of days later we tried again with some of the plastic craft lace I picked up at Walmart on one of my shopping trips there. This worked MUCH better! I got the idea here:

http://www.mynameissnickerdoodle.com/2010/02/colors.html

The recipe is simple:
Pasta
2 tablespoons Rubbing Alcohol
Food coloring

*Place in a seperate ziploc bag per color and leave in the bag until you have achieved your desired color. Dry on cookie sheets, stirring occasionally to help the rubbing alcohol evaporate.

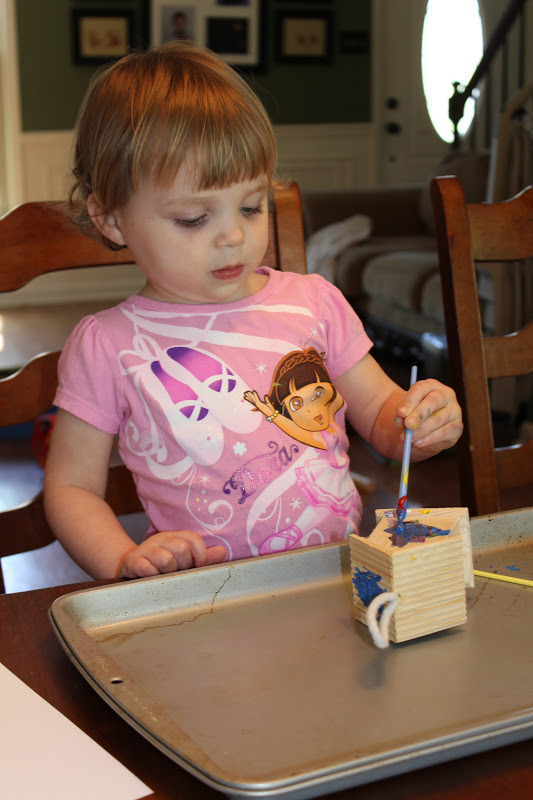
In one of my many visits to Pinterest I read about tapping down one end of the string to the table to help make it easier for little fingers to thread their beads. This worked so well!! I definitely recommend it! My almost 3 year-olds twins had a little trouble figuring out what they had to do with their hands to get the beads to stay on the string, but after I helped each of them with the first couple of beads they were soon doing it on their own! They both LOVED their necklaces and wore them proudly for a long time!


Fancy Pumpkins & Pumpkin Gardens

Lana's favorite book is "Fancy Nancy." She loves anything "fancy." When I saw this pumpkin decorating idea on Pinterest I knew it would be perfect for her!!

http://www.hgtv.com/handmade/how-to-make-glittered-pumpkins/index.html

But I also knew the boys would NOT love it! So when I found this idea I knew it was something they could really get into!! Anything involving DIRT is usually a big hit with my boys!

http://www.growinginprek.com/apps/blog/show/9483735

Both projects were pretty easy. We did them together on a beautfiul Saturday afternoon in October. You can do these inside, but we choose to do them outside since it was such a nice day. Neither one really needs a ton of instructions, but here's the basics.

Fancy Glitter Pumpkins

Supplies: Pumpkin, Glue, Paintbrush and Glitter
Instructions: Pour glue on pumpkin and spread with brush. Pour glitter overtop of the glue and let dry.


Pumpkin Gardens

Supplies: Pumpkin, Carving Tool, Dirt
Instructions: Cut out the top of the pumpkin and empty some of the seeds out of the middle, making sure to leave some of the seeds inside to grow. Fill with dirt. Water. Place in a sunny spot.


A couple of weeks after we filled our pumpkins, our seeds started to sprout!

Wednesday, October 10, 2012

Magnetic Letter Matching


This is a great little activity that you can use in a variety of ways. I made this Letter Matching "game" to help my kids match upper case and lower case letters. I just used some of my scrapbooking paper and then laminated the individual pieces so that they are more durable and then added magnets to the backs because everything is more fun with magnets!! Mine fit perfectly on our dishwasher :-)

Painting With Marshmallows

This activity with so much fun! The kids loved it because they FINALLY could play with their food!

This is pretty simple. All you need is paper, paints and marshmallows. The first time we tried this I put the paints in egg cartons, which didn't seem to work very well because the marshamallows were a little too big. The next time I used some old lids we had and that worked much better! Both times we tried this the kids went back and forth between using paintbrushes and using the marshmallows.

I would highly recommend this one!!


Spring is for the Birds!

We did two crafts for Spring this year that the kids loved because they were for the birds! The kids and I absolutely love one of the trees in our backyard. It's a nice big shade tree right outside our kitchen and dining room windows. The birds and squirrels seem to love it too! There are always lots of critters hanging around it. We have a large birdfeeder hanging from the tree, but we thought it would be fun to add some other things that the birds might enjoy.

The first thing we did was paint small birdhouses to hang in the tree. I had been shopping at our local craft store the week before and found these neat little wooden birdhouses on sale for a dollar each. We had been given paint and brushes as a favor at one of the birthday parties we had attended recently so it was great being able to use them on the birdhouses! We only had one real incident when Jackson decided that it would be funny to paint Lana instead of his birdhouse, which of course made her cry because her new Dora shirt was now "dirty!!"

Our second project was to make bird seed ornaments. We did this a few days after we painted the birdhouses and it was a lot of fun. It took a little more skill to do this so Tate, Lana and Jackson mostly watched as Nathan and I did the majority of the work.

Here are the directions:
3/4 cup birdseed (we got the seed for small birds at wal-mart)
1/4 cup water
1 small envelope of knox gelatine
twine or string
cookie cutters, molds or mason jar lids
wax paper


*Mix together the envelope of gelatine with 1/4 cup of water and bring to a simmer while stirring. continue stirring until the gelatine is dissolved.
*Remove from heat and let cool for a minute.
*Stir in the 3/4 cup birdseed. Adding a little more if there is liquid still in the bottom of the pan.
*Lay your cookie cutters out on wax paper and fill half way with the birdseed mixture.
*Cut your twine, knot the end and push the knot down into your birdseed.
*Continue filling with birdseed, covering the end of your twine and knot.
*Push the birdseed evenly into the cookie cutter until it's full.
*Allow them to dry overnight, turning them over every now and then.
*Remove from the cookie cutters and hang them in your trees.
*Then wait by the window to watch for your first guest.


If You Give a Mouse a Cookie

We've been doing some great activities with books lately! One of our favorites was "If You Give A Mouse a Cookie." We read the book and then we decorated cookies, drew pictures of our family and then ate our cookies while drinking milk through straws. After we were done with our pictures we hung them on the refrigerator just like in the story!


Tuesday, September 25, 2012

"Ten Apples Up On Top" with Apple Playdough

We love books. Especially books that allow us to play and read at the same time! I saw a recipe on Pinterest for Apple Playdough but didn't have the book the original blogger used with her activity. After looking through my bookshelf I realized we had "Ten Apples Up on Top" and that it would be perfect! I picked up some inexpensive apple cookie cutters at my local craft store so that the kids could all make apples while we read the book. This apple scented playdough would be perfect for any fall activity or book with apples in it! It smells SO yummy!

The first thing we did was make the playdough. Here's the recipe:

*1 cup flour
*1/2 cup salt (use iodized, not kosher for smoother dough)
*1 Tablespoon olive oil
*1 Tablespoon cream of tartar
*1 cup water
*Red food coloring (I use the Wilton gel colors)
*1/2 teaspoon ground cinnamon
*1/4 teaspoon ground nutmeg
*1/8 teaspoon ground allspice
*1/8 teaspoon ground cardamom

1. Stir ingredients together well in pot. 
2. Over medium heat cook the dough, stirring constantly until it forms a ball. 
3. Turn dough onto a board (or the countertop) and knead until very smooth. 
4. Cool. 
5. Store in a covered plastic container.

When we were reading the book I kept a cookie cutter and a portion of the playdough for myself, making an apple each time the characters in the story added one to the tops of their heads and stacking mine like the illustrations.


Elephant Toothpaste

This is such a fun little science experiment that is a variation on the volcano explosion we all know from elementary school science class. My kids were amazed at how thick the mixture came out! We will definitely be doing this a lot!

I got the idea and the recipe here:
http://preschoolpowolpackets.blogspot.com/2012/01/science-experiment-elephant-toothpaste.html

*2 tablespoons warm water
*1 teaspoon yeast
*1/2 cup 6% (or higher) Hydrogen Peroxide. (I couldn't find this in stores so I ordered it from Amazon.)
*4-5 drops of food coloring
*squirt of dish soap.

1. Set a bottle or a jar in the middle of a cookie sheet.
2. In a seperate bowl mix water and yeast together and let sit until dissolved.
3. Mix the hydrogen peroxide, the food coloring and the dish soap in your bottle.
4. Pour the yeast mixture into your bottle.
5. Watch the reaction!


Magic Mud

This was so cool! This activity lasted for well over an hour and it kept Tate's attention the longest! This will definitely go into my bag of tricks! We had already been playing with this for almost an hour when Nathan got home from school and he joined right in, taking it outside and playing with it for another half an hour at least! Definitely great for kids of all ages!

1 cup of water
food coloring
2 cups of corn starch

*Pour water into a bowl.
*Add food coloring and stir until mixed thoroughly
*Add 2 cups of corn starch
*Mix well. This will take some effort! It is not easy to mix, but once mixed it is a lot of fun!

This activity is a great way to play with solid vs. liquid. If you gently touch the mixture it reacts like a liquid, but if you strike the mixture hard to reacts like a solid. My kids were amazed at how it could be so gooey one second and hard as a rock the next!

Clean up is easy. If any gets out of the bowl is dries quickly and can be swept up. Any other residue is quickly cleaned up with a wet rag. I should have realized ahead of time that so much of the mixture was going to end up outside the bowl, but I didn't. Next time I may put down a layer of our craft paper to help clean up even easier! And I will definitely double the recipe next time to make enough for each kid to have their own bowl or cookie sheet.